Knitting's Basic Stitches
The knit stitch (k)
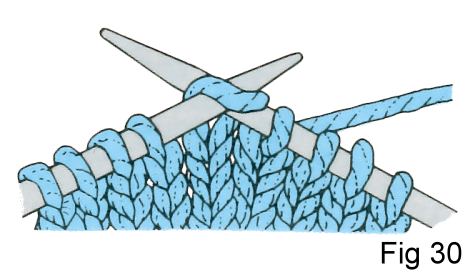
1. With the yarn at the back of the work, insert the right hand needle from left to right through the front of the first stitch on the left hand needle (Fig.30).
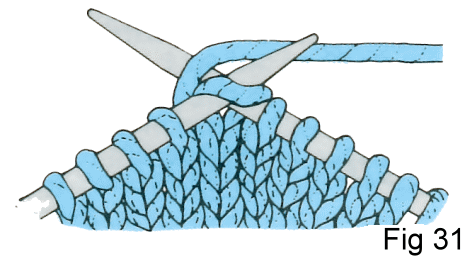
2. Wind the yarn over the right hand needle (Fig.31).
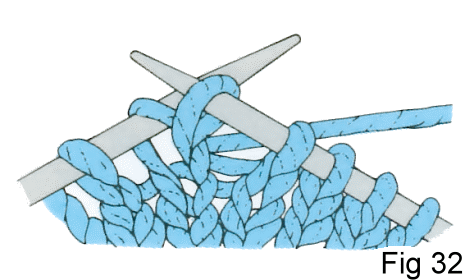
3. Pull through a loop (Fig.32).
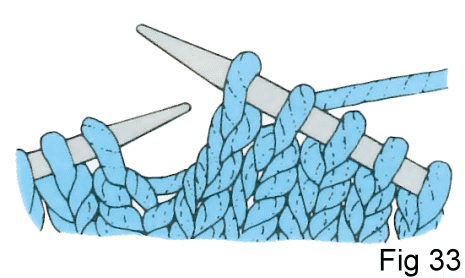
4. Slip the original stitch off the left hand needle (Fig.33).
Repeat until all the stitches have been transferred from the left to the right hand needle.
To knit into the back of a stitch (KB1)
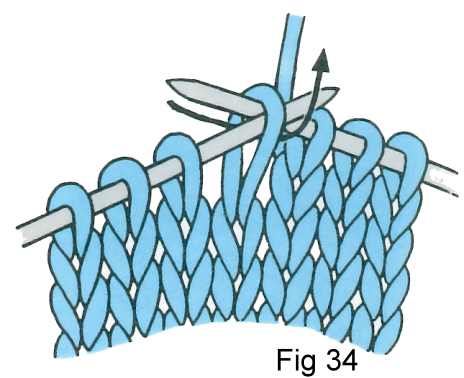
This technique is sometimes used to create a twisted rib effect, as well as some textured stitch patterns. Insert the needle into the back of the stitch on the left hand needle (Fig.34), then follow steps 2 to 4 for the knit stitch.
The purl stitch (p)
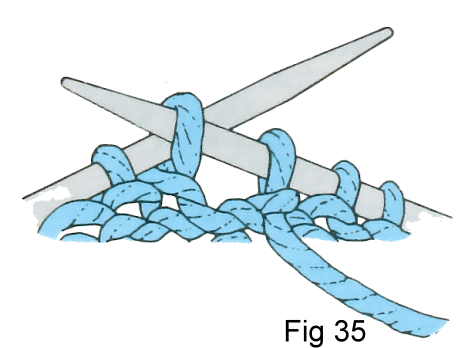
1. With the yarn at the front of the work, insert the right hand needle from right to left through the front of the first stitch on the left hand needle (Fig.35).
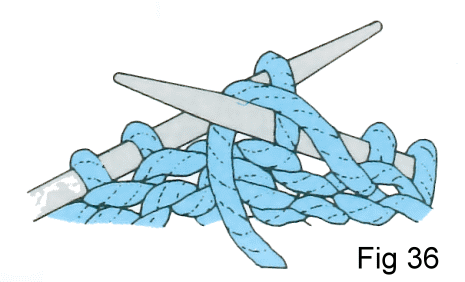
2. Wind the yarn round the right hand needle (Fig.36).
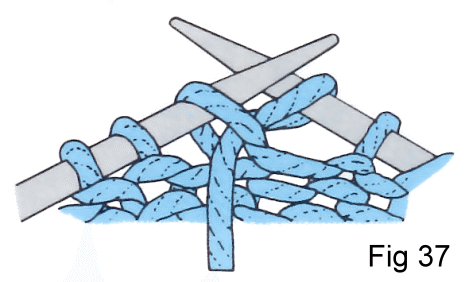
3. Draw a loop through to the back (Fig.37).
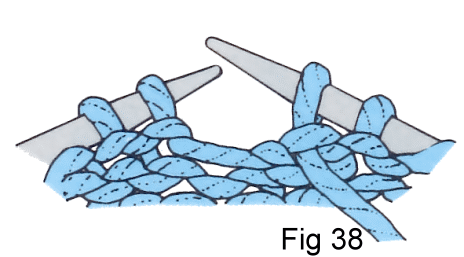
4. Slip the original stitch off the left hand needle (Fig.38).
To purl into the back of a stitch (PB1)
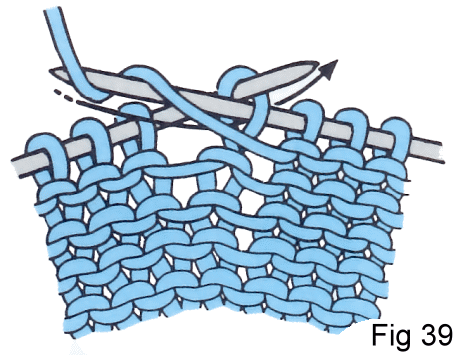
Insert the needle into the back of the stitch on the left hand needle from behind and bring the point of the right hand needle through to the front (Fig.39), then follow steps 2 to 4 for the purl stitch.
The garter stitch
The garter stitch is formed by working every row as a knit row, the first row usually being the right side (Fig.40).
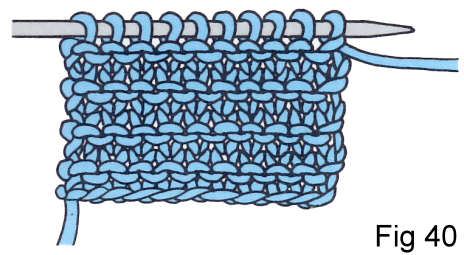
The same effect can also be achieved by working every row as purl.
Stocking stitch
Stocking stitch is made up of one row of knit stitches followed by one row of purl stitches, starting with a knit row, which is the right side of the work.
Reverse stitch
Reverse stocking stitch is made up of one row of purl stitches followed by one row of knit stitches, starting with a purl row, which is the right side of the work.
Ribbing
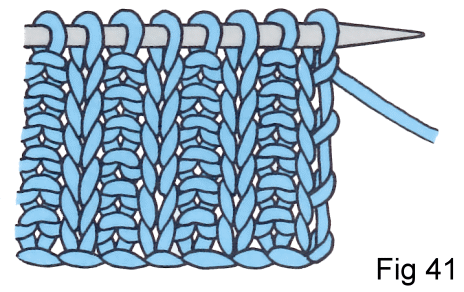
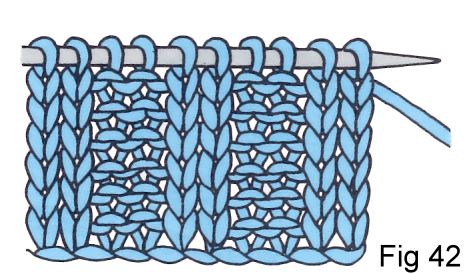
Ribbing is an elastic fabric which is often used for garment edgings. The two most usual types are 1x1 rib, which is formed by alternating 1 knit stitch and 1 purl stitch (Fig.41) and 2x2 rib which is formed by alternating 2 knit stitches and 2 purl stitches (Fig.42). Care must be taken to purl the stitches which were knitted on the previous row and vice versa.
Knit one Below (K1B)
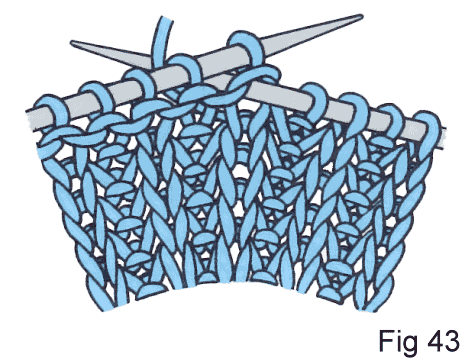
This stitch is used in Fishermen’s rib. Insert the right hand needle into the next stitch but in the row below the stitch on the left hand needle. Then knit the stitch as normal (Fig.43).
All content provided by TB Ramsden & Co.